1Getting started
Activating your account and signing in.
1.1 Activating your account
Your administrator creates your account and LeadsGenie emails you an invitation. The link takes you to a Set up your password page: choose a password of at least 8 characters, confirm it, and you're in.
1.2 Signing in
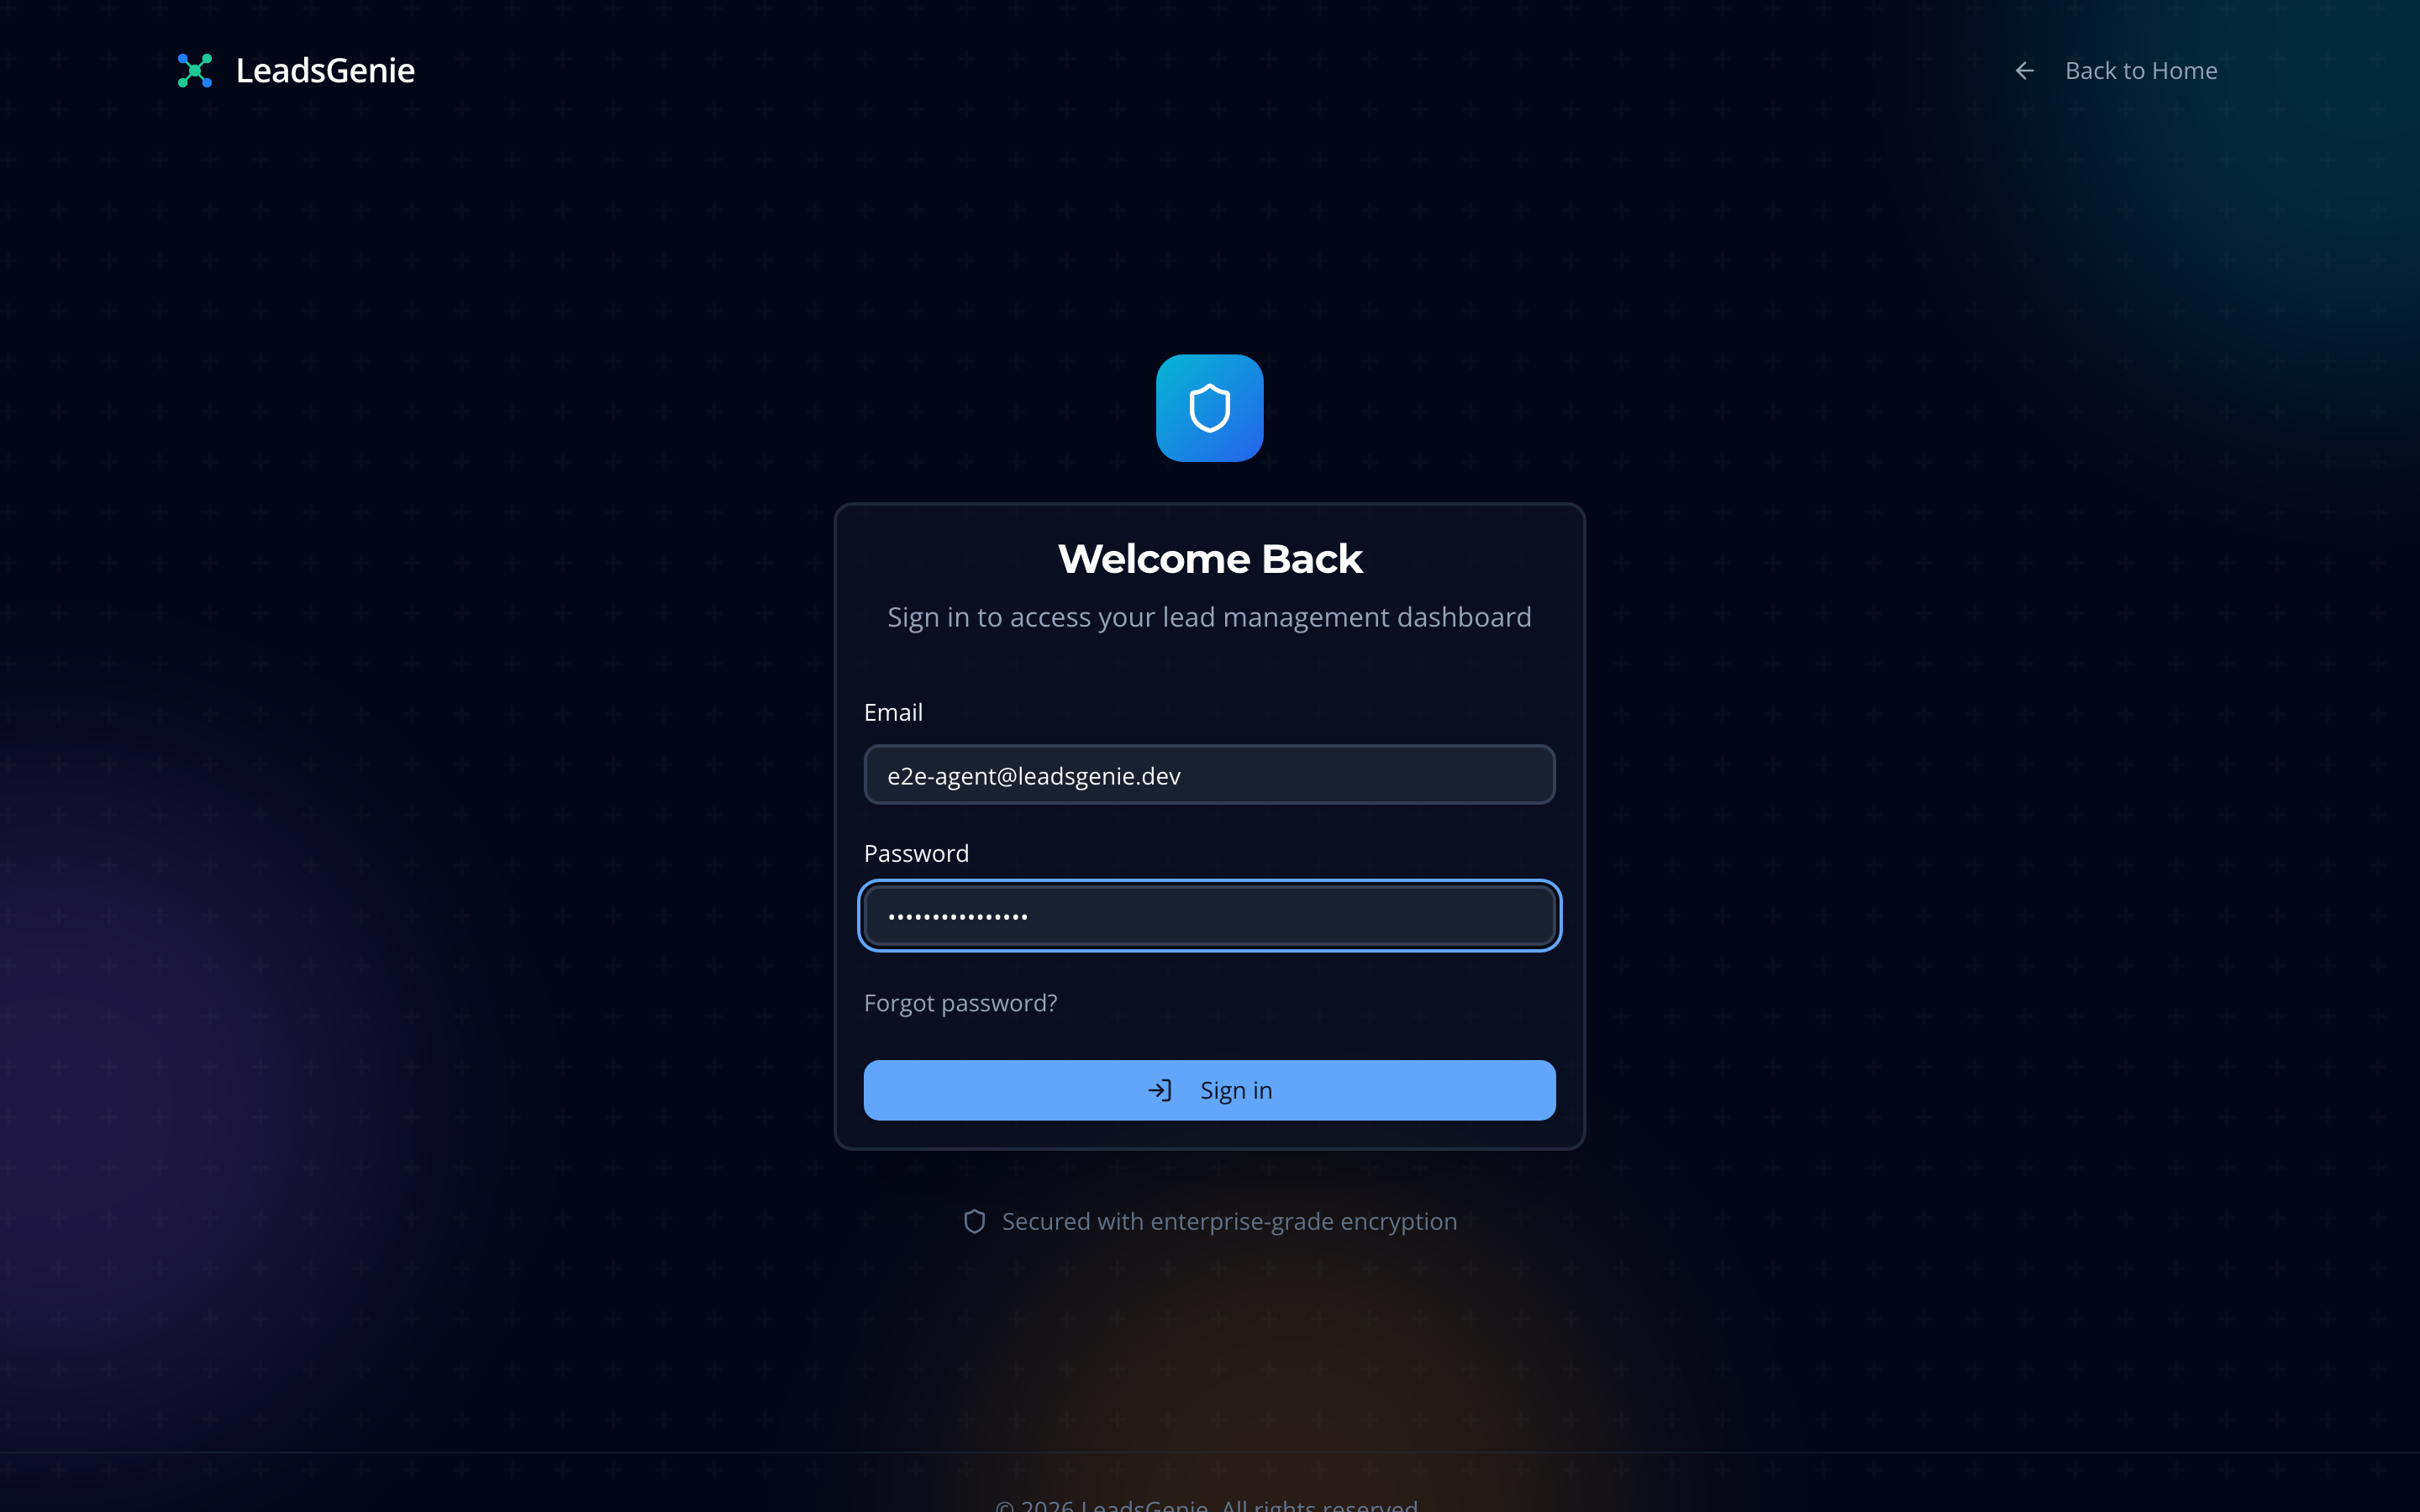
- Wrong password? Failed attempts are counted and shown; repeated failures lock the account briefly. Wait for the timer, then retry.
- Forgot your password? Click Forgot password? to receive a reset email.
- Session timeout: after 30 minutes of inactivity you are signed out automatically.
2The mobile app
LeadsGenie installs on your phone as an app, built for working leads on the road.
2.1 Installing it on your phone
- Open LeadsGenie in your phone's browser (Chrome on Android, Safari on iPhone) and sign in.
- When the browser offers Install app / Add to Home Screen, accept it. (In Chrome it's in the ⋮ menu; in Safari it's under the Share button.)
- Open LeadsGenie from your home screen from now on. It launches full-screen, like any other app.
2.2 Your home screen: the leads list
The installed app has two tabs at the bottom: Leads and Settings. The Leads tab is your work list. It shows your active leads (finalised ones drop off), with the follow-up date on each card. Chips at the top switch between All and Follow-up (with counts), and the refresh button pulls the latest data. The list also updates in real time as leads change.
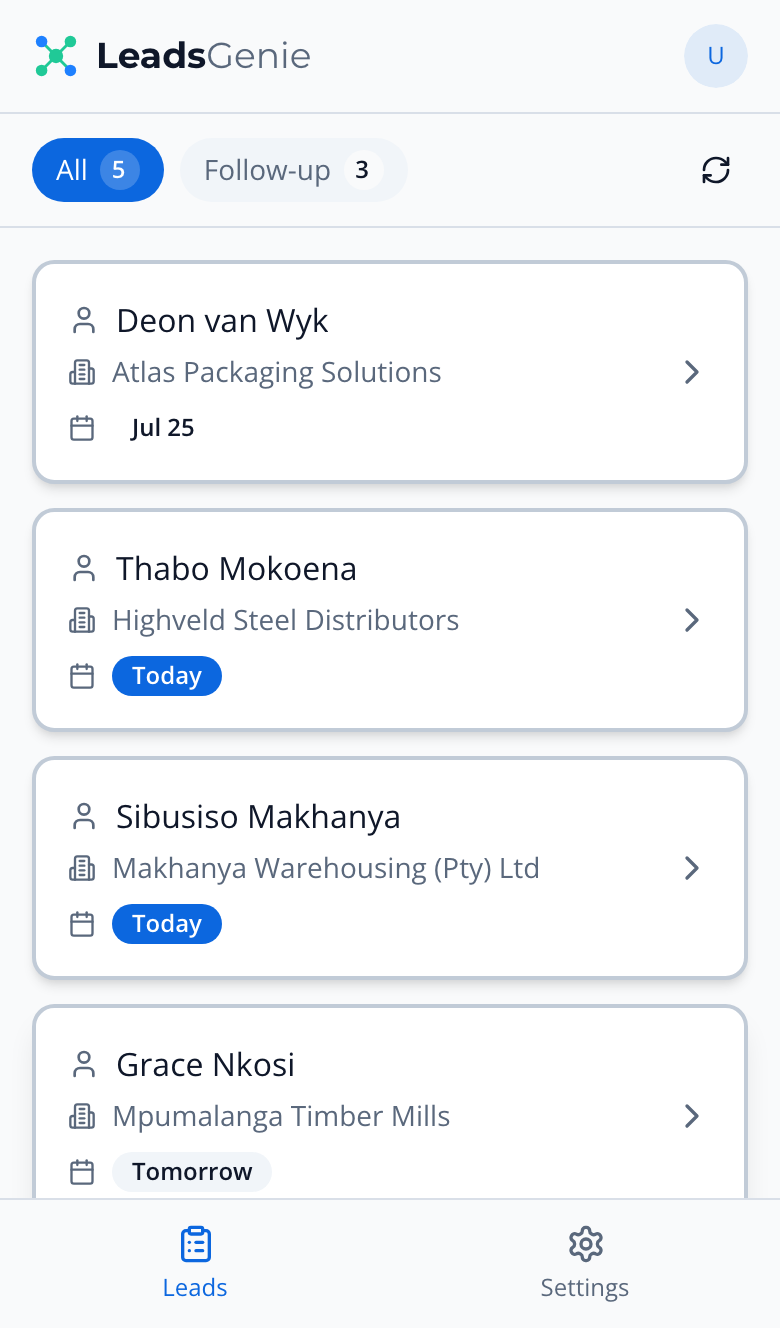
Tap any card to open the lead (chapter 4).
3Finding your leads
You see exactly the leads you own. Coordinators see their whole team's leads.
3.1 How leads reach you
Agents capture leads and allocate them. The moment a lead is assigned to you, you get a notification (bell, and email where configured) and the lead appears in your list. New assignments are the top priority: the escalation clock starts when the lead is allocated (chapter 5).
3.2 On the desktop
On a computer, the Leads workspace shows your leads in a table you can search, filter and sort:
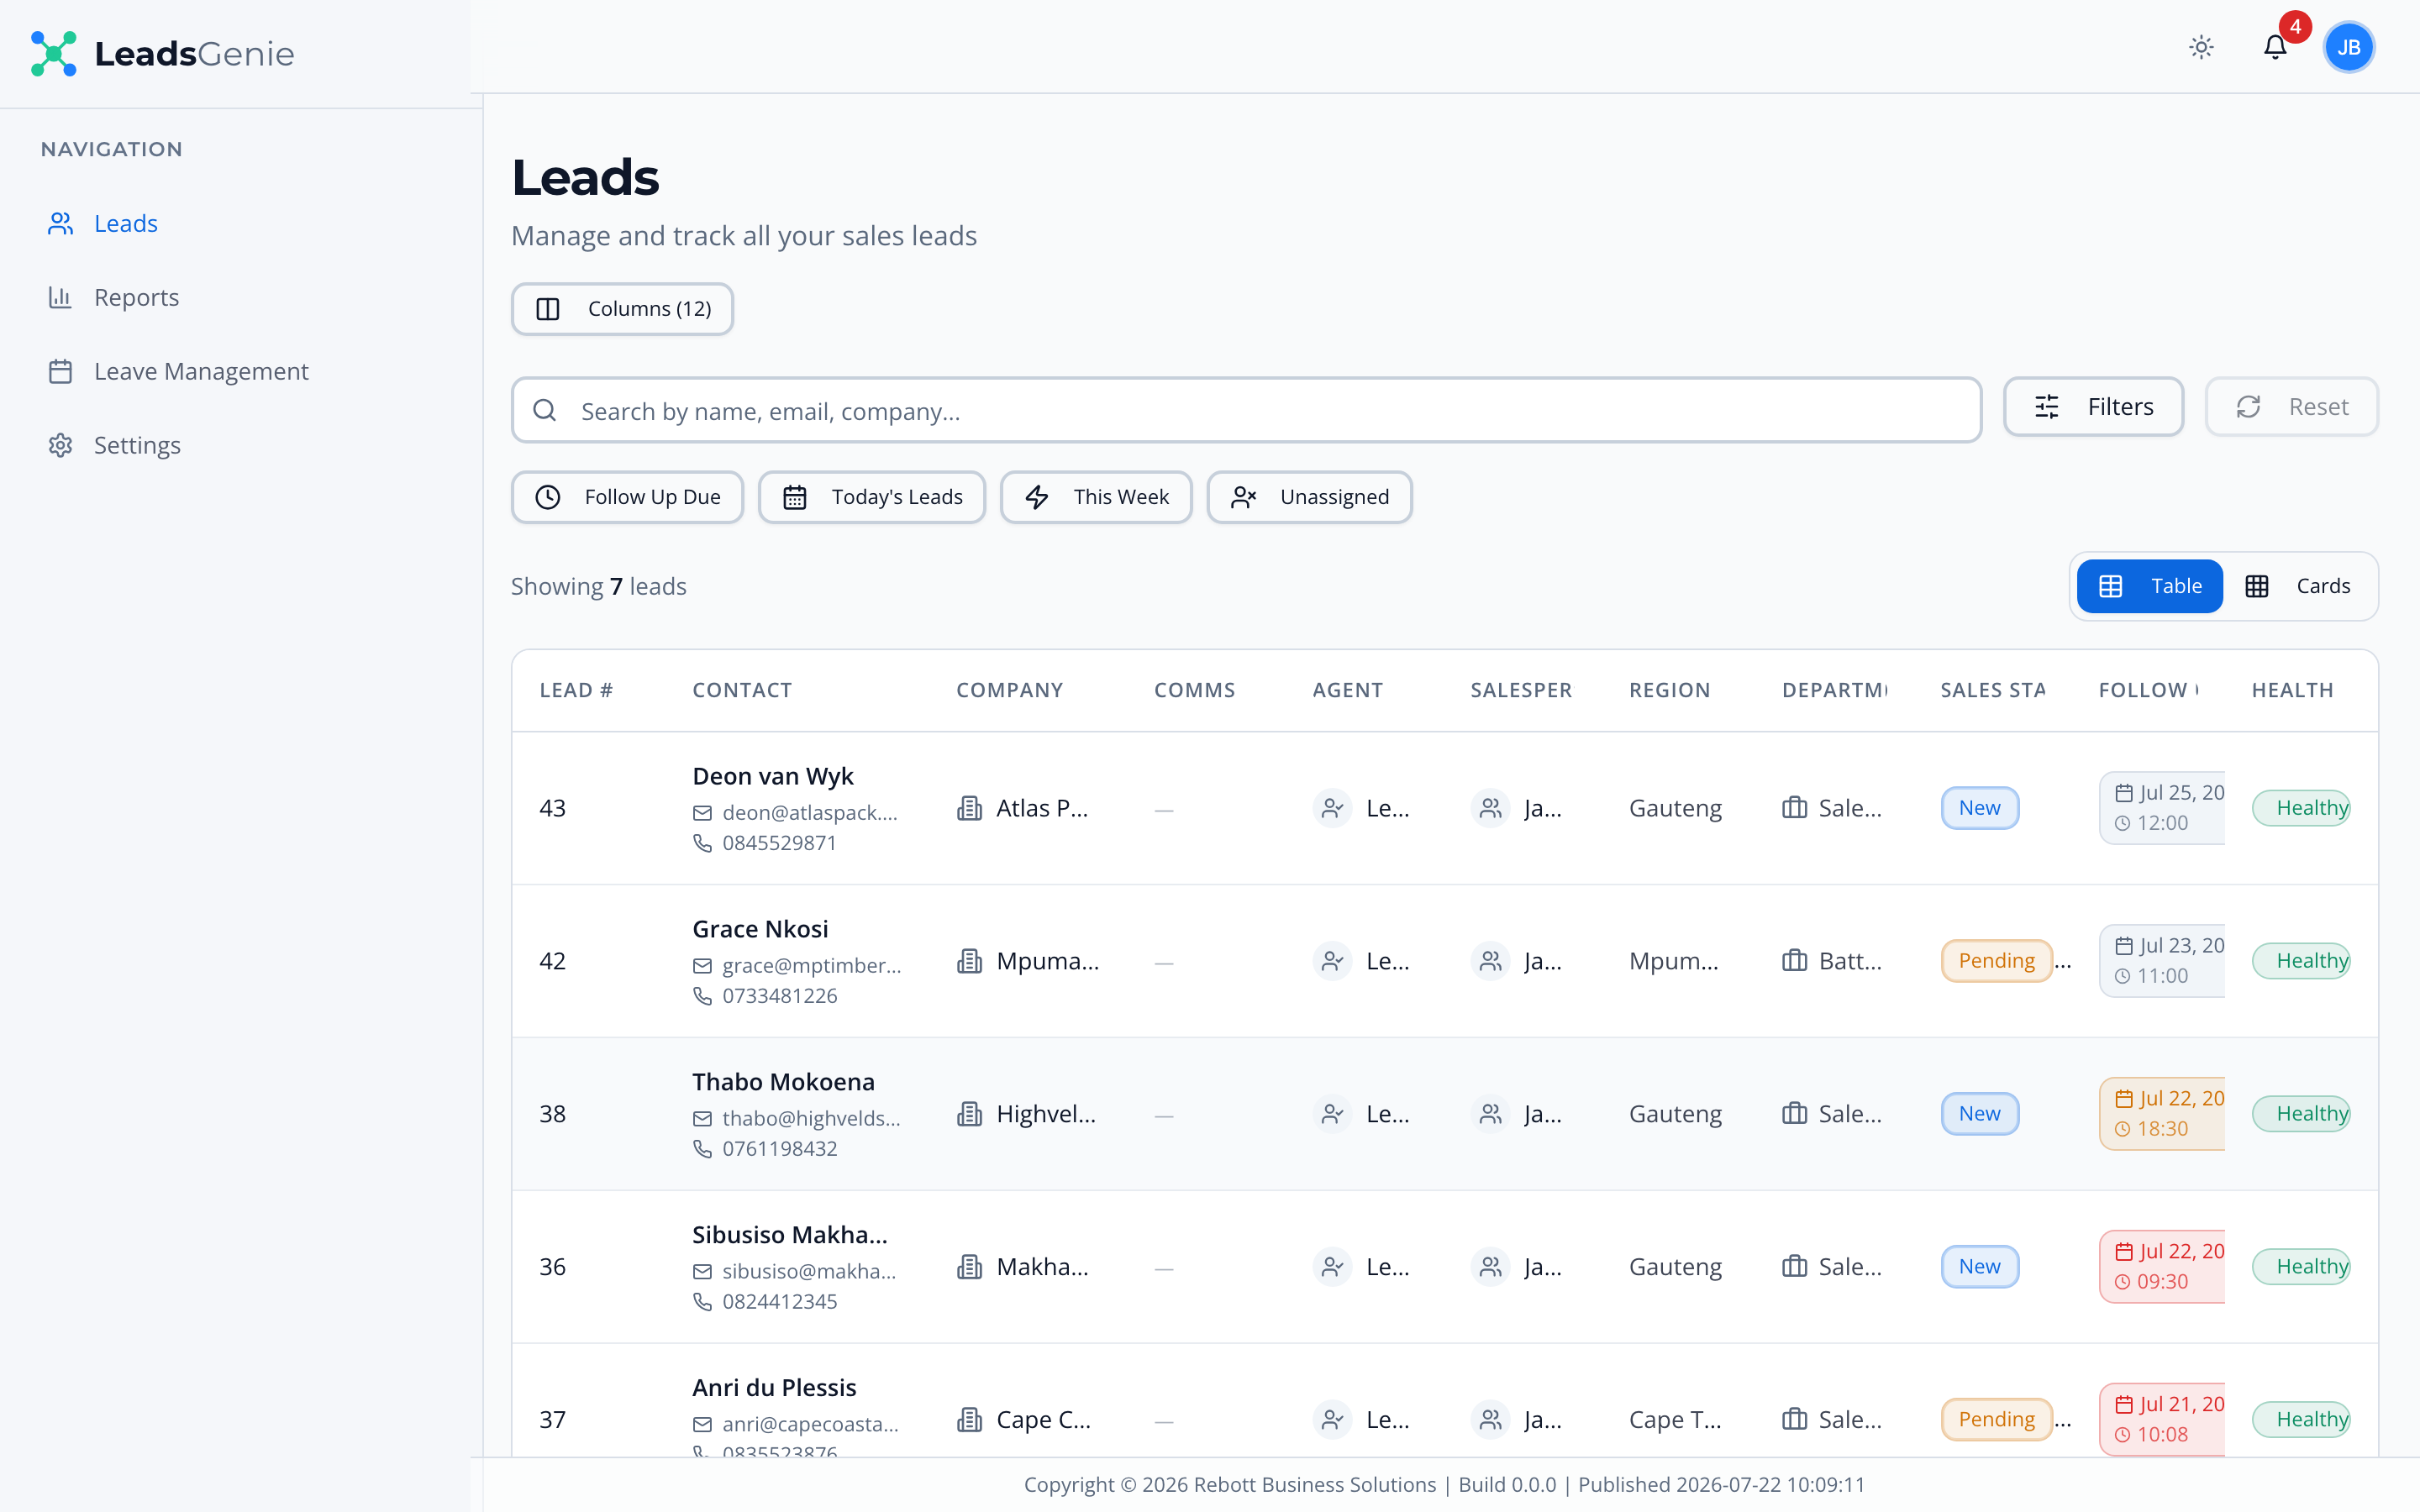
- Search by contact name, email or company.
- Quick filters: Follow Up Due, Today's Leads, This Week.
- Filters panel: Sales Status, Follow Up, Created Date, and (under Advanced) Region, Department and Product.
- Columns: choose and resize the columns you care about; click a header to sort.
- Your filters, sorting and column choices are remembered between sessions.
Click a row to open the lead. On mobile browsers the table becomes cards; in the installed app you get the mobile list from chapter 2 instead.
4Working a lead
One screen gives you everything: contact actions, status, follow-up and notes.
4.1 Contacting the customer
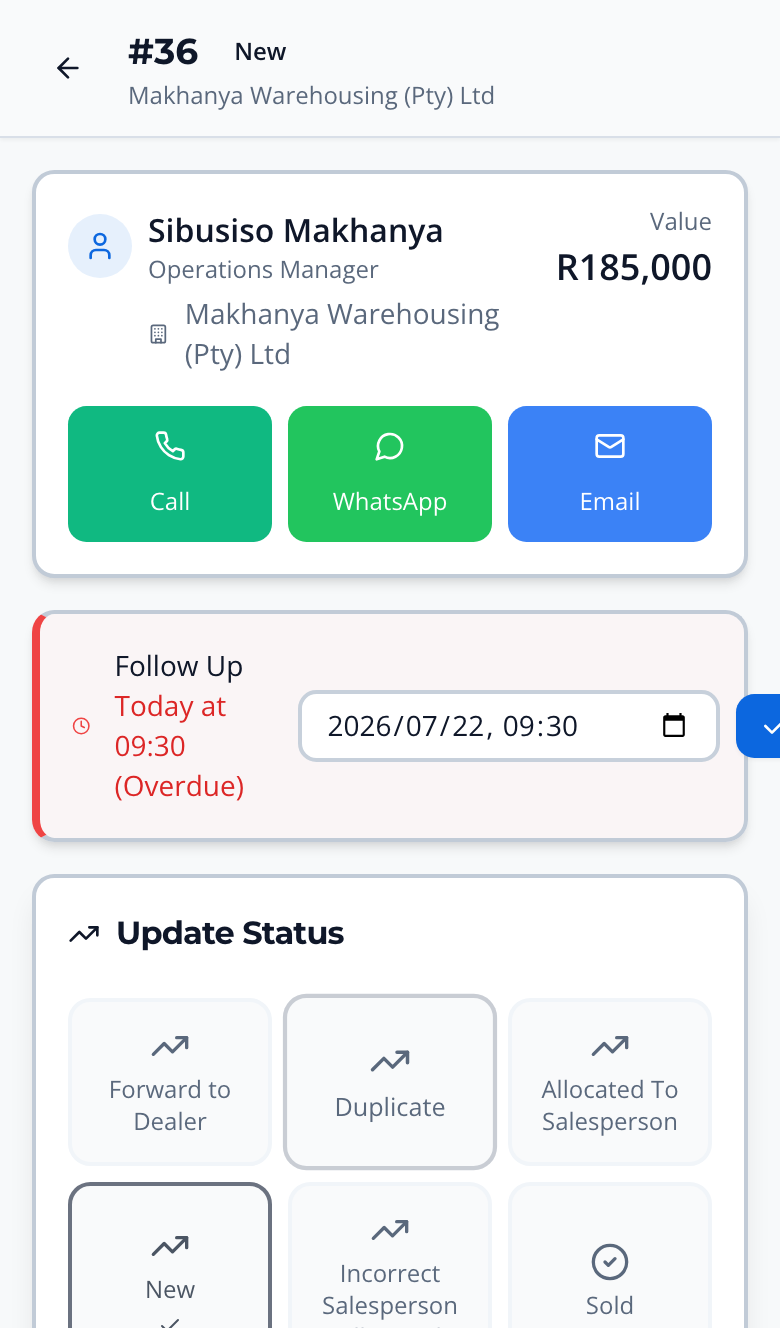
The customer card shows the contact person, company and deal value, with three one-tap actions:
- Call dials the customer's number.
- WhatsApp opens a WhatsApp chat with them (South African numbers are converted automatically).
- Email opens a new email to them in your mail app.
4.2 Updating the status
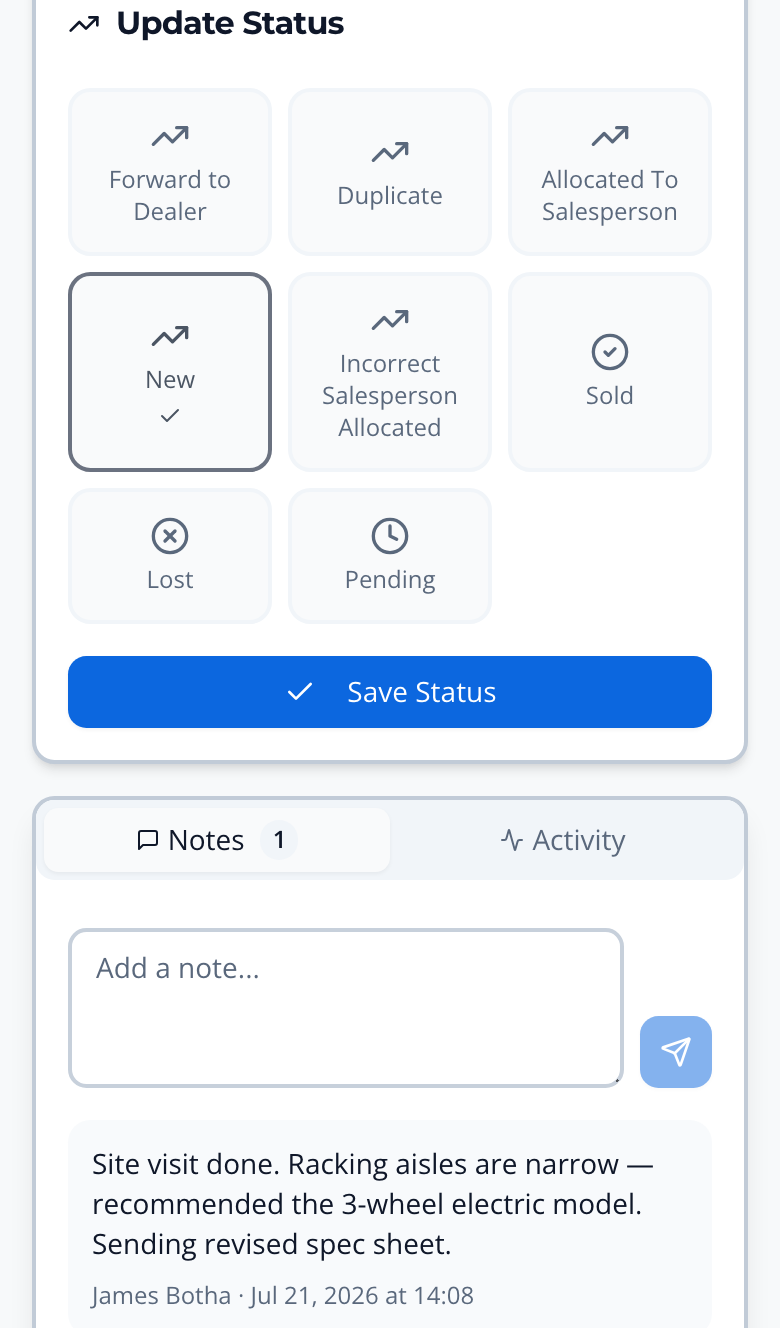
Tap the tile that matches where the deal stands, then Save Status:
| Status | Use it when… | Reason needed? |
|---|---|---|
| New | You haven't engaged the customer yet. | No |
| Pending | You're waiting on something (quote sent, decision pending…). | Yes |
| Sold | Deal closed-won. Final: the lead leaves your active list. | No |
| Lost | Deal closed-lost. Final: pick the reason (pricing, stock, timing…). | Yes |
| Duplicate | This duplicates another lead. | No |
| Forward to Dealer | The enquiry belongs with a dealer. | No |
| Incorrect Salesperson Allocated | This lead shouldn't be yours. Flag it so the agent reallocates it. | No |
4.3 Follow-ups
The Follow Up card shows the current follow-up date and time; overdue ones are highlighted in red. To reschedule, pick a new date and time and tap the save button next to the picker. Set a follow-up every time you finish a conversation, so the lead comes back to you at the right moment.
4.4 Notes and activity
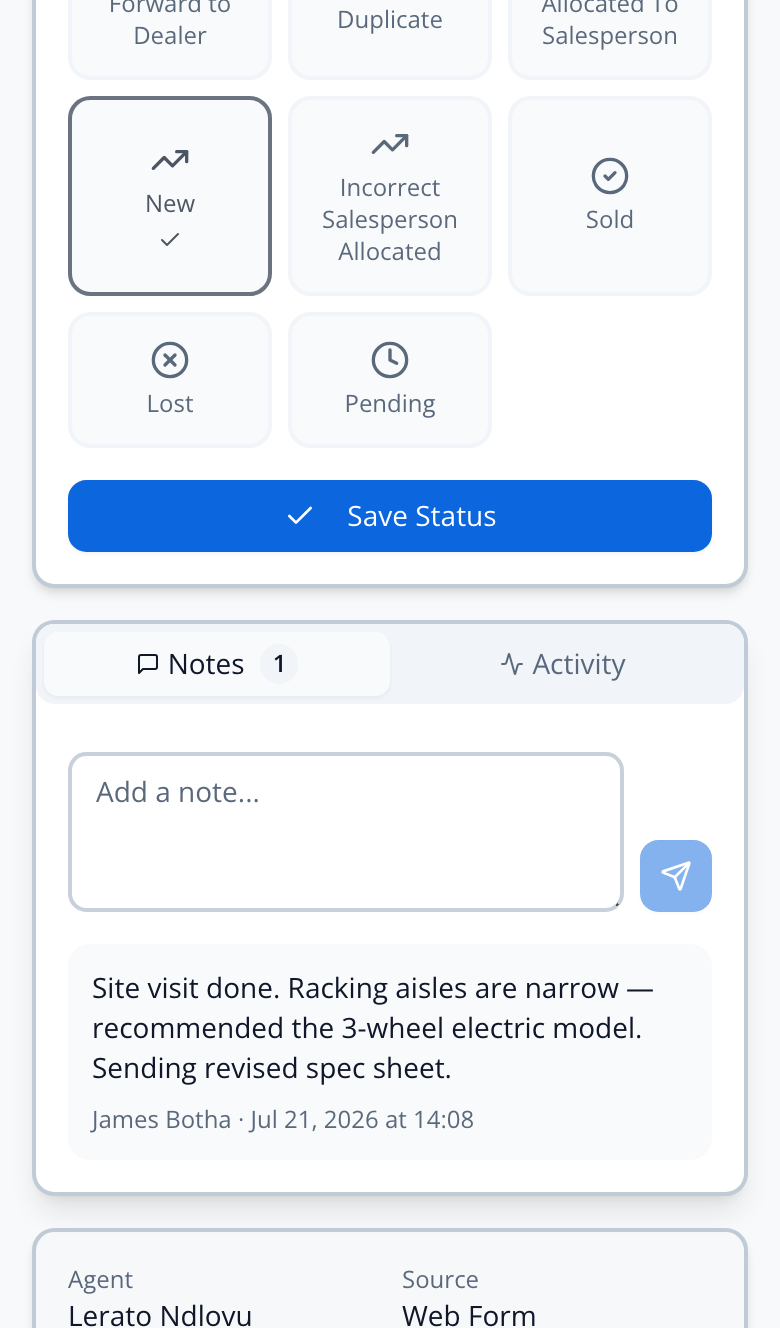
- Notes: type and send. Notes are timestamped with your name and visible to everyone working the lead.
- Activity: the full timeline of the lead (creation, assignment, status changes, escalations, notes).
Below the tabs, the lead info panel shows the capturing agent, the source, and created/updated times.
5Follow-ups, health & escalations
LeadsGenie tracks responsiveness automatically. Here's what the flags mean for you.
5.1 Lead health
Each active lead carries a health badge, computed automatically from follow-up discipline and activity:
Healthy being worked, nothing overdue At risk going quiet Overdue follow-up missed or inactive too long
High-value leads (over R50,000) are held to stricter thresholds. Work your reds first, then ambers.
5.2 Escalations
If a lead assigned to you gets no action within the required first-response time, LeadsGenie escalates it: the lead is flagged, the escalation is logged on its activity timeline, and an urgent notification goes to you and your coordinator/supervisor.
An escalation isn't a punishment; it's the system making sure no customer is left waiting. When you get one, open the lead, contact the customer, and update the status or add a note. That activity clears the pressure.
6Leave & delegation
Book leave and hand your leads to a colleague, so nothing escalates against you while you're away.
- On the desktop, open Leave Management in the sidebar and click Request Leave.
- Pick your start and end dates.
- Choose a Delegate: the colleague who handles your leads and escalations while you're away.
- Optionally add a reason, then Create Leave.
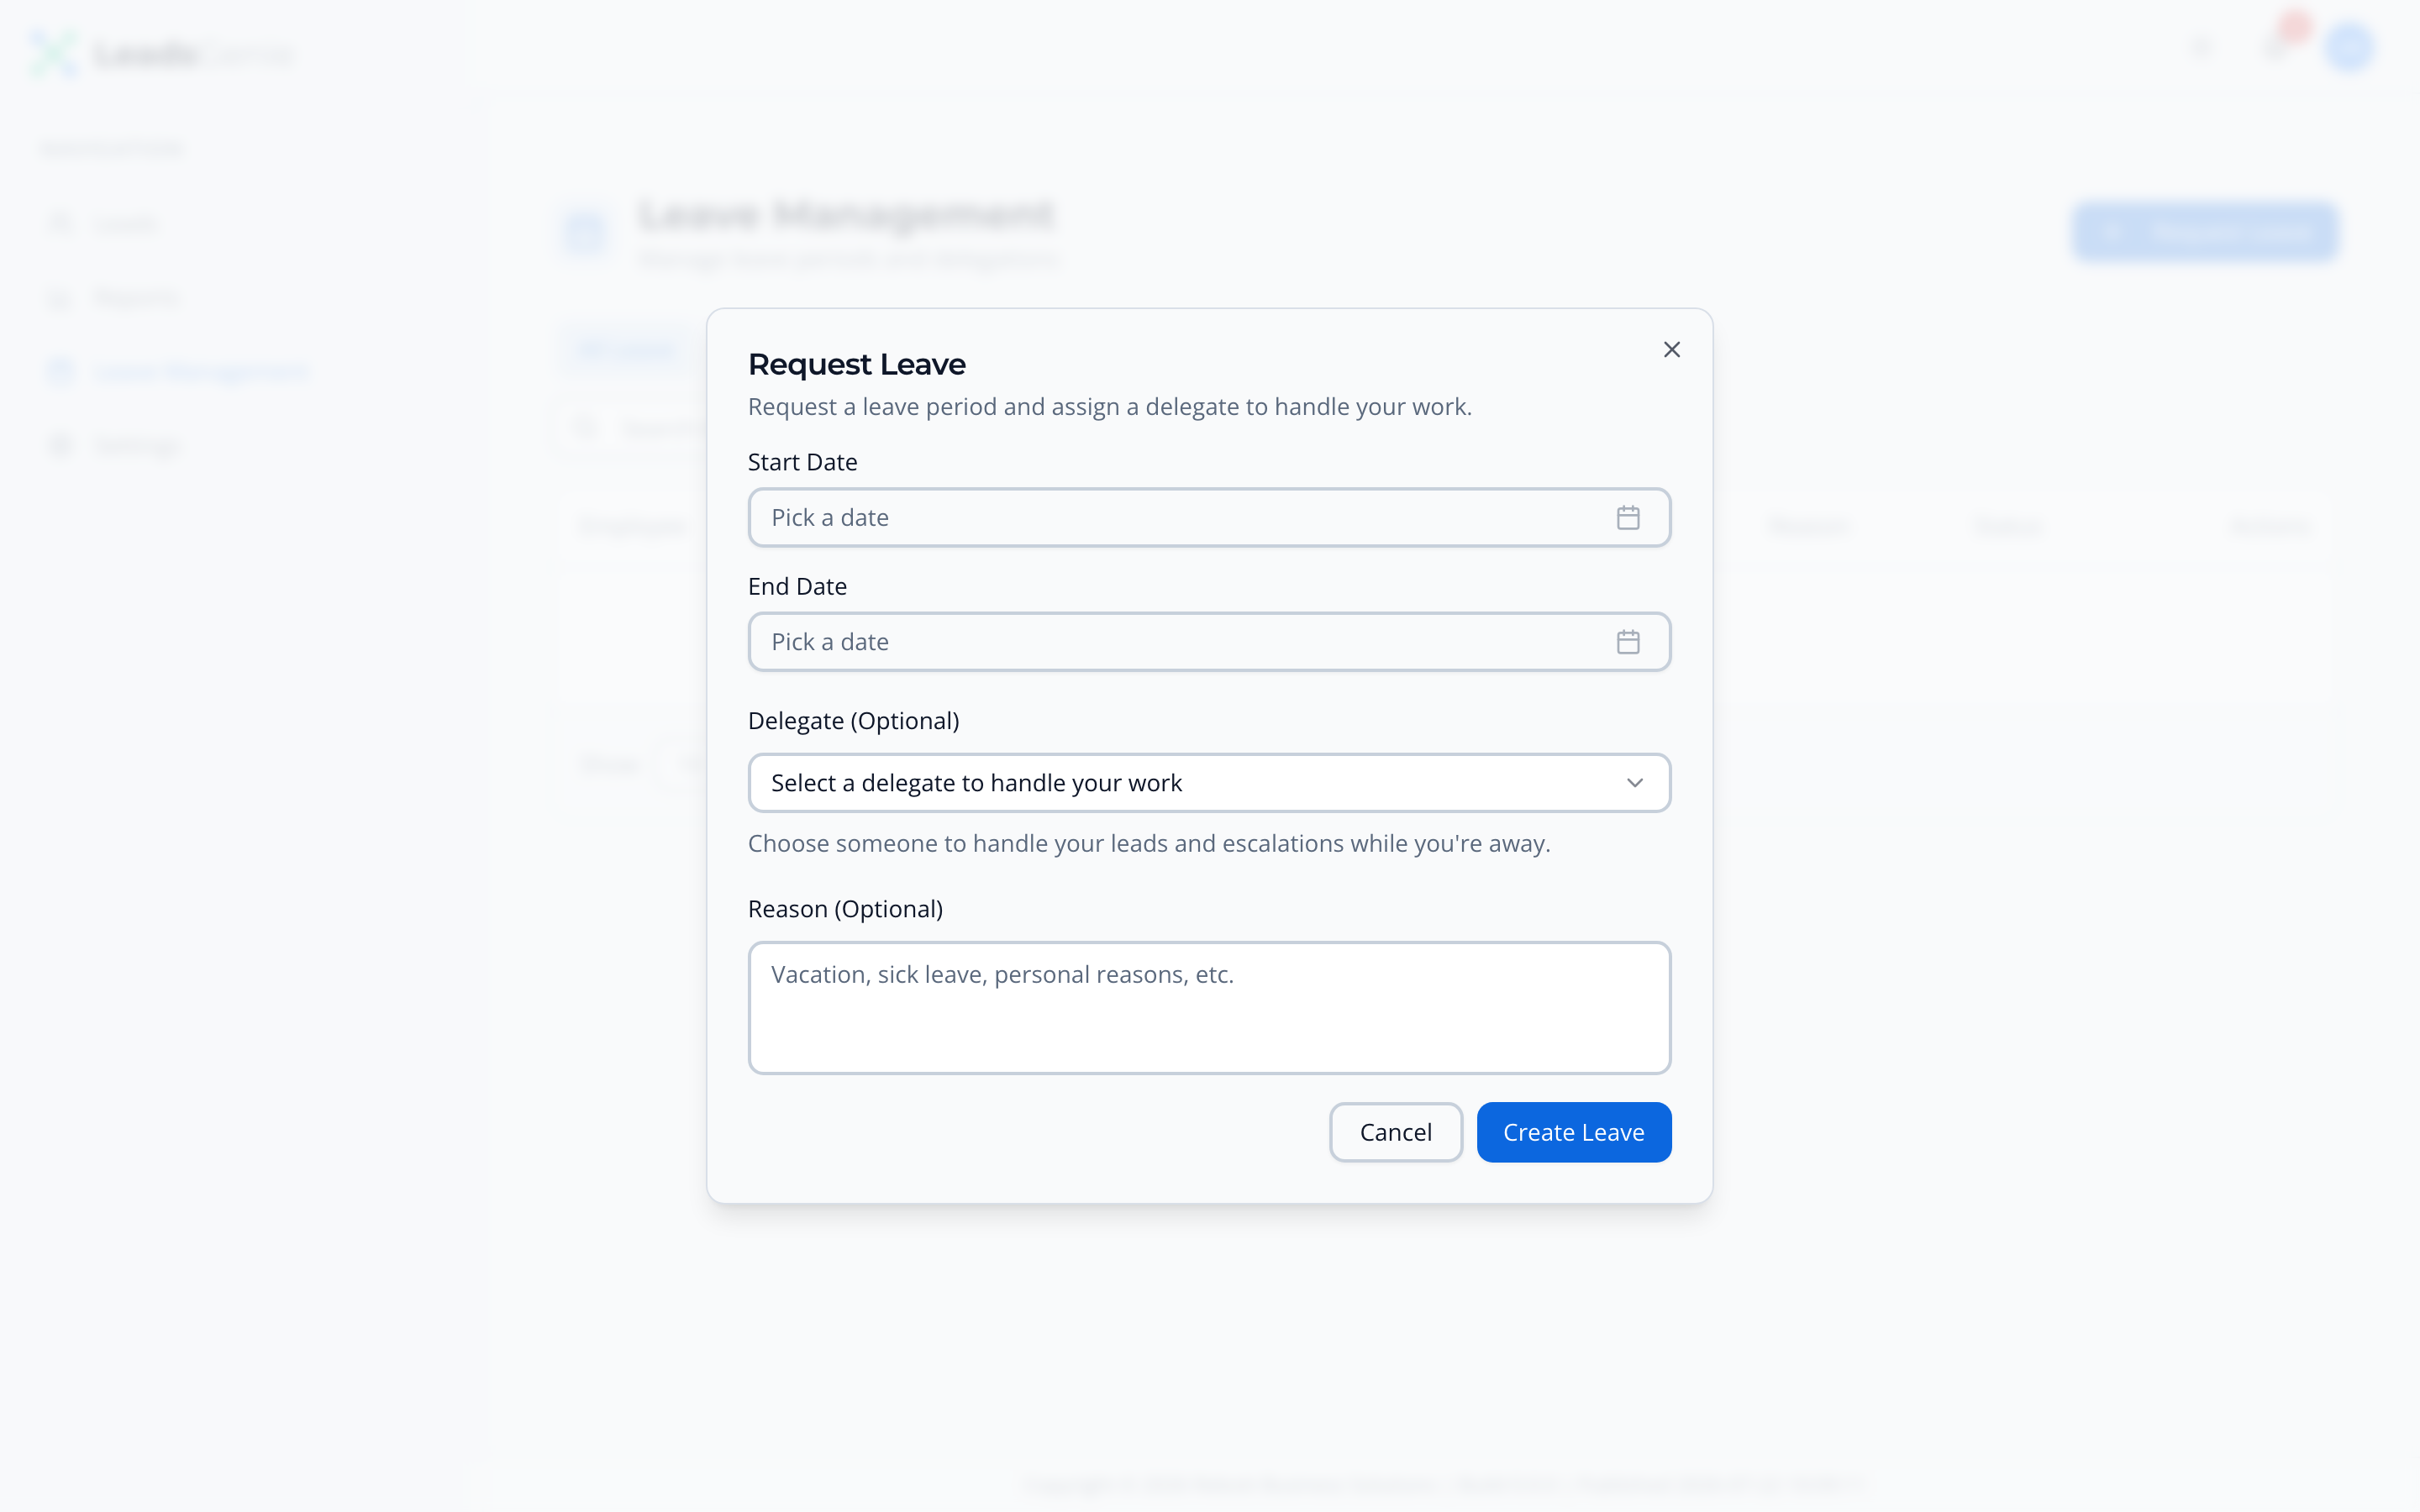
You can see your own leave, plus any leave where you are someone's delegate. Coordinators also see their team's leave. Edit or cancel periods from the row actions.
7Notifications
Assignments, follow-ups due, and escalations reach you the moment they happen.
The bell in the header (desktop) shows your unread count in real time; click a notification to jump to the lead. The Notification Center (bell menu → Open Notification Center) is the full inbox: filter by type (Lead Assigned, Follow Up Due, Lead Escalated…), severity (info warning urgent) or date, show unread only, and mark items read singly, in bulk, or all at once.
The notifications you'll see most:
- New lead assigned: a lead is now yours; act on it promptly.
- Follow-up due: a follow-up you scheduled has arrived.
- Lead escalated: a lead went unactioned too long (chapter 5).
8Reports
Your numbers at a glance, on the desktop.
Open Reports in the sidebar. The Overview shows Total Leads, Conversion Rate, Pipeline Value and Pending CSI, with tabs for sales performance, CSI tracking, remarketing, analytics and a drill-down table. The figures reflect the leads you can see: your own for a salesperson, the whole team's for a coordinator.
9Settings & account
Password, appearance and signing out.
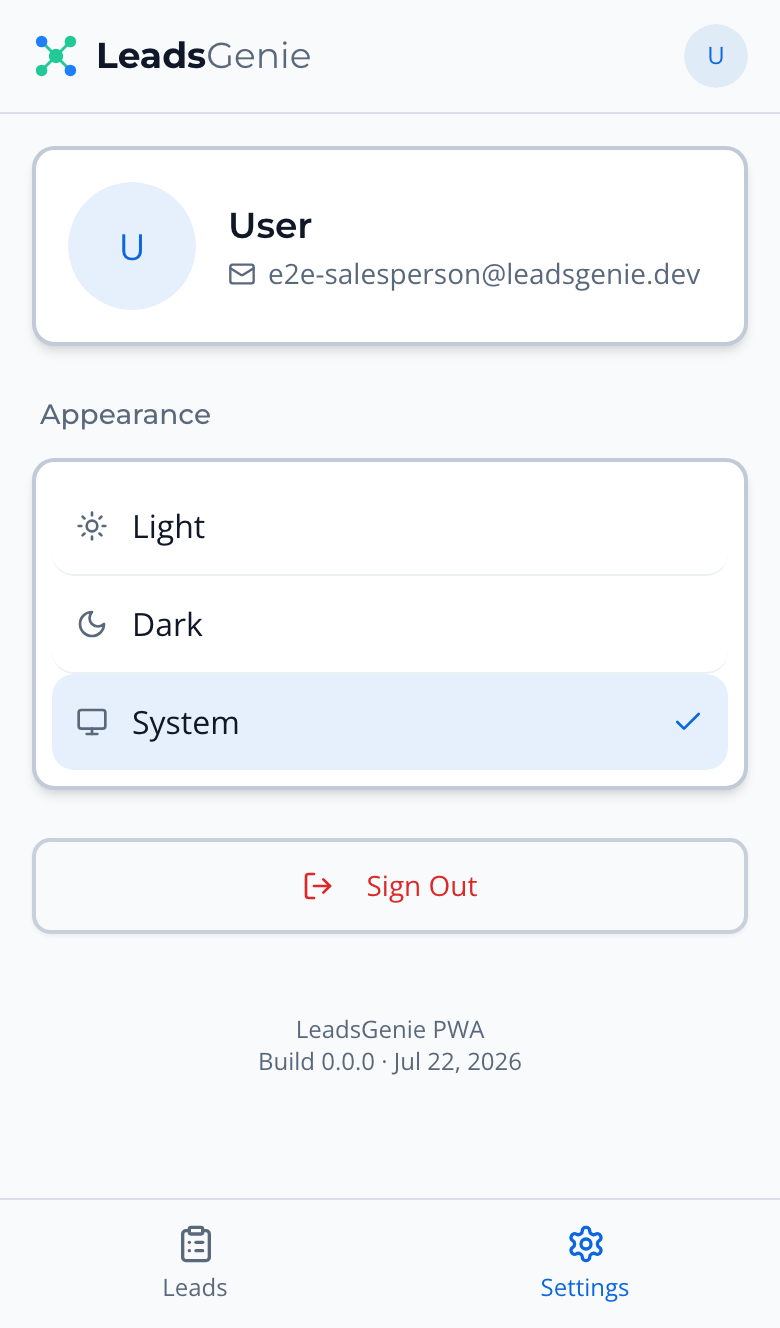
- Appearance: Light, Dark or System, in the app's Settings tab (or the sun/moon toggle in the desktop header).
- Change password: on the desktop, Settings → Security (minimum 8 characters).
- Sign out: the Settings tab in the app, or the profile avatar menu on the desktop.
10FAQ & quick reference
Fast answers to common questions.
- Why can't I see a lead a customer mentioned? You only see leads assigned to you (or, as a coordinator, to your team). Ask the capturing agent or an admin to check the assignment.
- Why is there no "Add New Lead" button? Lead capture is the agents' job. If you pick up a new prospect, pass the details to an agent to capture and assign to you.
- A lead was allocated to me by mistake. Set its status to Incorrect Salesperson Allocated so the agent reallocates it.
- Why did a lead disappear from my app list? It was finalised (Sold or Lost). Finalised leads leave the active list; find them on the desktop workspace if needed.
- Why can't I change the Agent Status? That track belongs to the capturing agent. You drive the Salesperson Status.
- I can't save a status. Statuses like Pending and Lost need a reason; pick one from the dropdown that appears.
- I got an urgent escalation notification. Open the lead, contact the customer, update the status or add a note. See chapter 5.
- Going on holiday? Book leave with a delegate first (chapter 6).
Status colour legend
Blue new / informational Amber in progress / pending Green sold / healthy Red lost / overdue / urgent